
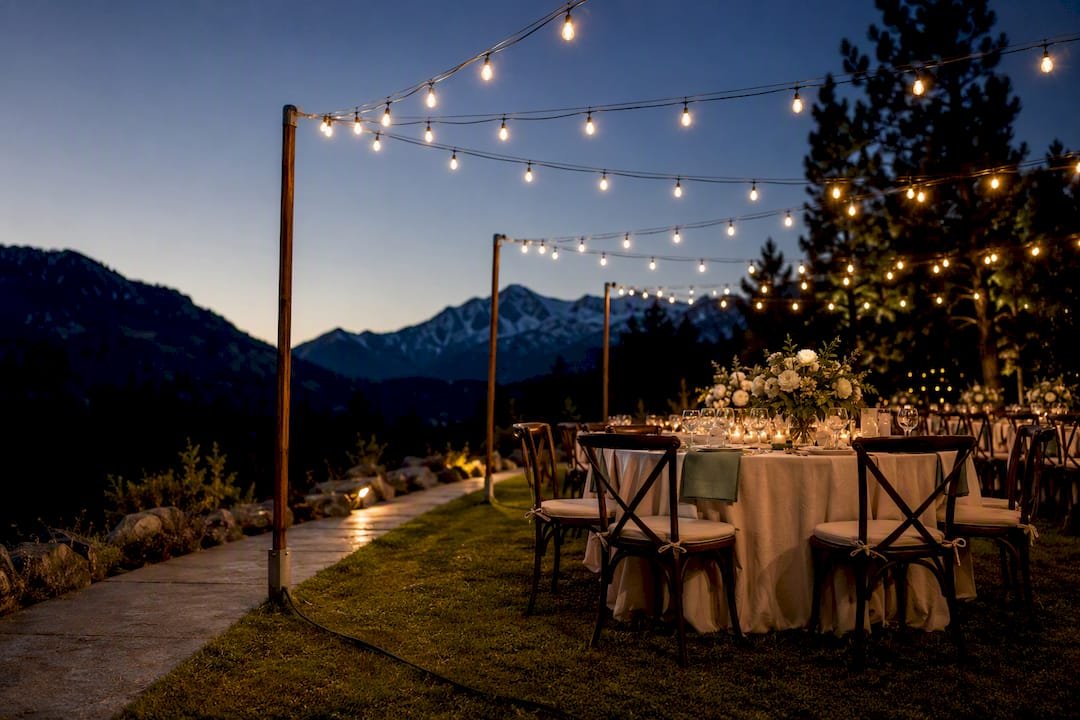
The easiest way to light an outdoor wedding: pick one overhead anchor, a bistro or string-light canopy, and pair it with a floor-level glow from lanterns or uplighting. That two-layer combination handles most of the visual work on its own. Before you buy a single bulb, confirm power access, what the venue allows you to attach things to, and how you’ll weatherproof the whole setup.
TL;DR:
- Confirm that your venue permits attachment points and has sufficient power capacity before selecting lighting fixtures.
- Use one main overhead anchor, such as string-light canopies, paired with floor-level lanterns or uplighting for balance and depth.
- Rely on IP44-rated string lights, GFCI outlets, and proper wire tensioning methods to ensure safety and weatherproofing.
- Choose warm white (2700K to 3000K) bulbs with high CRI for flattering photos and avoid mixing too many distinct lighting elements to prevent clutter.
- Consider venue features like existing structures, rain plans, and onsite lodging to simplify logistics and reduce the risk of last-minute issues.
Table of Contents
- Outdoor Wedding Lighting Ideas That Actually Photograph Well
- How to Design and Layer Your Lighting Plan
- Power, Weatherproofing, and Safety Requirements You Can’t Skip
- How to Hang String and Bistro Lights Without Sagging or Snapping
- Choosing Bulbs: Color Temperature and How Light Reads in Photos
- What Outdoor Wedding Lighting Actually Costs
- What to Check Before You Buy: A Shopping Checklist
- What to Confirm With Your Venue Before You Plan Anything
- The One Thing Most Lighting Guides Get Wrong
- A Venue That Simplifies the Lighting Logistics for You
- Sources
Outdoor Wedding Lighting Ideas That Actually Photograph Well
Most couples overthink this. The strongest outdoor wedding lighting setups use one dominant look and one or two supporting touches, not five competing styles fighting for attention. Pros who install lighting for a living tend to agree that more than three distinct lighting elements usually creates clutter instead of atmosphere. Here’s the ranked list of ideas worth your budget, starting with the one that does the most heavy lifting.
-
Bistro or string-light canopies. A crisscross or swagged pattern of string lights over a dance floor or dinner tables is still the most reliable overhead anchor for outdoor reception lighting. It reads as romantic in photos, works at any guest count, and scales from a small backyard to a full tented reception.
-
Hanging chandeliers and rattan fixtures. Suspended over a dance floor or sweetheart table, these add a dose of formality that plain string lights can’t match. They photograph beautifully against string-light canopies, which is why real wedding galleries so often pair the two.
-
Fairy-light curtains and hanging orbs. These work best as a photo backdrop rather than a functional light source. String them behind a sweetheart table or along a fence line for a soft, blurred bokeh effect in evening portraits.
-
Lantern groupings. Moroccan-style metal lanterns or simple battery lanterns along a path, down a table runner, or clustered at a bar area supply the floor-level glow your overhead anchor needs. This is the fastest way to add warmth without running new power.
-
Uplighting. Small LED uplights tucked at the base of trees, along a tent’s edge, or against a stone wall or barn facade give architecture and landscaping a glow without adding visible fixtures overhead. It’s the single most effective way to make a plain outdoor space feel intentional after dark.
-
Floating candles. If your venue has a pool or a pond, floating candles turn flat water into a lighting feature on their own. Skip real flame if there’s any wind risk and use flameless LED versions instead.
-
A single moment of drama. One disco ball over the dance floor, a neon sign with your names or a phrase, or a pin-spot gobo projecting your monogram onto a wall gives guests something to remember and photograph. Pick exactly one. Piling on multiple statement pieces dilutes all of them.
-
Fire pits and sparkler exits. A fire pit works as both a light source and a gathering point during cocktail hour. If you want a sparkler exit, confirm with your venue whether open flame is allowed and have a flameless backup ready.
Editorial planning guides from sites like The Knot and Brides consistently point back to the same principle: pick a strong overhead anchor, then layer in floor-level glow for balance. Everything else on this list is seasoning.
How to Design and Layer Your Lighting Plan
The layering formula is simple: one overhead anchor for atmosphere, one floor-level layer for warmth and safety, and no more than one accent element for drama. This structure works because it gives the eye a clear hierarchy instead of scattered points of light competing for attention.
Size the overhead anchor to your actual space and guest count, not to what looked good in a photo you saved. A 40×80 tent needs a very different string-light quantity than a 20-guest backyard ceremony. Measure the space first.
- Sketch your layout before you order anything, marking power sources, trees, poles, and tent structure.
- Order extra linear footage beyond your measurements to allow for swags and anchor-to-outlet runs, as a straight-line measurement underestimates the actual needed length.
- Place uplighting at the perimeter first, then fill in floor-level lanterns or candles toward the center, so photos have depth instead of one flat wash of light.
- Do a walkthrough with your venue contact and any lighting vendor before the wedding day, confirming outlet locations, attachment points, and rain contingencies.
- Test everything on-site at night at least once if you’re installing yourself. Daylight testing hides gaps that only show up after dark.
Pro Tip: Walk the venue at dusk, not midday, before you finalize your lighting order. Shadows and dark corners that seem irrelevant in daylight become obvious problems once the sun drops.
Power, Weatherproofing, and Safety Requirements You Can’t Skip
Outdoor weddings fail on logistics far more often than they fail on style. Planning for power and safety means lighting walkways, stairs, and bathroom paths as a first priority, not an afterthought squeezed in after the pretty stuff is ordered.
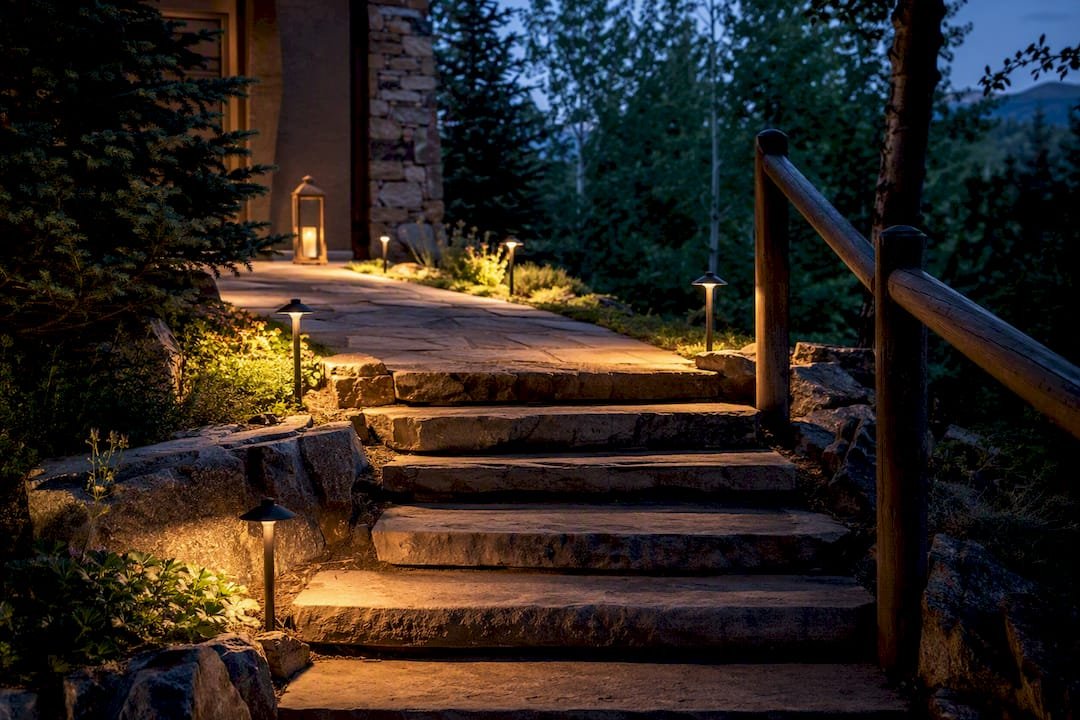
Safety and accessibility get overlooked more than almost anything else in outdoor wedding planning, and confirming power capacity before you show up with 300 feet of string lights avoids a tripped breaker mid reception.
Here’s the non-negotiable checklist:
- Check the IP rating. Look for IP44 or higher on any product page for lights staying outdoors overnight or near moisture; Super Bright LEDs’ patio string lights are a solid example of what an IP44-rated, UL-certified commercial string looks like on spec.
- Use GFCI-protected outlets. Any outdoor circuit powering your lighting should run through ground-fault circuit interrupter protection, and you should confirm the circuit’s total capacity before plugging in multiple strands.
- Bring in an electrician for anything complex. If you’re combining multiple circuits, running extension cords more than 100 feet, or powering a large tent, hire a professional rather than guessing at load limits.
- Size a generator correctly if the venue lacks power. Sites without adequate existing outlets need a rented generator sized to your total wattage draw, and this is worth confirming with your vendor weeks in advance, not the week of.
- Avoid open flame in breezy or tented spaces. High-end event planners recommend flameless LED alternatives and cordless rechargeable table lamps instead of candles once wind becomes a factor.
- Light every path, stair, and restroom route. This isn’t optional for accessibility, and it’s the detail that gets forgotten most often while everyone focuses on the reception centerpiece lighting.
Many guest injuries at outdoor events are due to poor path or stair visibility rather than the ceremony or dance floor area, highlighting the critical importance of properly lighting these areas.
How to Hang String and Bistro Lights Without Sagging or Snapping
The single biggest mistake in DIY outdoor wedding lighting is treating the light strand itself as load-bearing. It isn’t built for that. Professional installers run a separate steel guide wire, sometimes called a catenary wire, between anchor points and attach the actual string lights to that wire, not to whatever hooks or nails they started with.
- Set your anchor points first. Trees, poles, tent structure, or permanent screw hooks can all work, but confirm with your venue which surfaces you’re allowed to drill into or wrap.
- Run the guide wire under tension. This is what actually carries the weight and resists wind, not the light cord.
- Attach lights to the wire, not to each other. Zip ties or cable clips spaced every few feet keep the strand secure without straining the connectors.
- Order extra footage. As mentioned earlier, 10 to 15 percent more than your measured length covers swags and drape without a mid-run shortage.
- Protect every connector from moisture. Wrap exposed plug connections in electrical tape or use dedicated waterproof connector covers, especially anywhere the strand touches grass or dirt.
- Pack spares. Extra bulbs, spare connectors, backup batteries for lanterns, and at least one extension cord beyond what you think you’ll need.
Pro Tip: Rent or buy a wire tensioner if you’re stringing lights across a span wider than about 30 feet. A hand-tightened wire that looks fine at setup often sags by the time cocktail hour starts.
Venue-friendly anchor options matter too. Some properties won’t allow screws in trees or exterior walls, which is exactly why confirming attachment rules with your venue host before you buy anything saves you from returning gear at the last minute.
Choosing Bulbs: Color Temperature and How Light Reads in Photos
Warm white, in the 2700K to 3000K range, is what photographers ask for on almost every outdoor wedding shoot. It flatters skin tones and matches the warm glow of golden hour, while cooler white bulbs (4000K and up) tend to look clinical and wash out photos taken after dark.
High CRI, or color rendering index, is worth checking on the product spec sheet too. A higher CRI rating means colors and skin tones render more accurately under that light source, which matters more than most couples realize until they see the difference in their gallery.
- Stick to warm white (2700K to 3000K) for anything near faces: dance floors, dinner tables, sweetheart table backdrops.
- Reserve colored lighting, if you want it at all, for uplighting on architecture or a dance-floor accent, never as a wash over guest seating.
- Choose dimmers rated for your specific light type; smart plugs work for simple on/off control, but true dimming of larger installs often needs an electrician’s input.
- Compare bulb styles before you order: Edison-style bulbs give a vintage, visible-filament look that photographs as a warm amber glow, globe bulbs read cleaner and more modern, and fairy lights create a soft blur effect better suited to backdrops than direct lighting.
Timing matters here too. A reception scheduled around sunset lets your string lights take over gradually as natural light fades, instead of looking harsh against full daylight or invisible against a completely dark sky.
What Outdoor Wedding Lighting Actually Costs
Budgets vary enormously depending on whether you’re stringing lights over a backyard patio or lighting a 40×80 foot tent for 150 guests. Here’s a realistic range broken down by project size.
The cost difference comes down to labor, hardware, and equipment rental, not just the lights themselves. A professional install includes guide wire, anchor hardware, an electrician’s time for load balancing, and often rental poles or a generator if the venue lacks adequate power.
Paying for a professional installer makes the most sense when you’re dealing with a complex hang across a large tent, when load balancing across multiple circuits is involved, or when your venue has strict rules about what can attach to its structures. DIY makes sense for smaller backyard-scale setups where you control the space and don’t need a wire tensioned across 60 feet of open air.
Cost-saving substitutes exist too: battery-operated lanterns instead of wired fixtures, consumer-grade string lights instead of commercial ones for a one-night backyard event, and borrowing or renting anchor poles instead of buying them outright.
What to Check Before You Buy: A Shopping Checklist
Before adding anything to your cart, run through this list. It applies whether you’re buying one string of lights or outfitting an entire tent.
- Total linear footage needed, plus your 10 to 15 percent buffer for swags and drape.
- IP rating, IP44 minimum for most outdoor use, IP65 if the site is exposed to heavy rain or standing water.
- Linkable or end-to-end connectable strands, so you can join multiple runs without extra outlets.
- Dimmable operation, confirmed against the dimmer or smart plug you plan to use.
- Plug type and cord length, matched to your actual outlet locations.
- Warranty and certification, look for UL or ETL listing as a baseline quality signal.
A few real product examples show what these specs look like in practice. Super Bright LEDs’ patio string lights list IP44 weatherproofing, a 150 foot run, 2700K warm white bulbs, and UL certification, a useful benchmark for commercial-grade quality. Retailers also carry 200 foot commercial-style linkable strings, sold under names like Yescom or DELight, which list shatterproof Edison bulbs and dimmable operation at a lower price point than fully commercial gear. For smaller backyard setups, consumer brands like Govee offer affordable, easy-to-install options that work fine for a single evening event, though they generally lack the IP65 rating and heavy-duty connectors that a large tented reception needs.
For large installations spanning an entire tent or acreage, renting from a lighting company often beats buying outright, since you avoid storing hundreds of feet of cable you’ll never use again. Guide wire, anchor hardware, and GFCI-rated extension cords are typically available at hardware stores or through the same rental company supplying your tent.
What to Confirm With Your Venue Before You Plan Anything
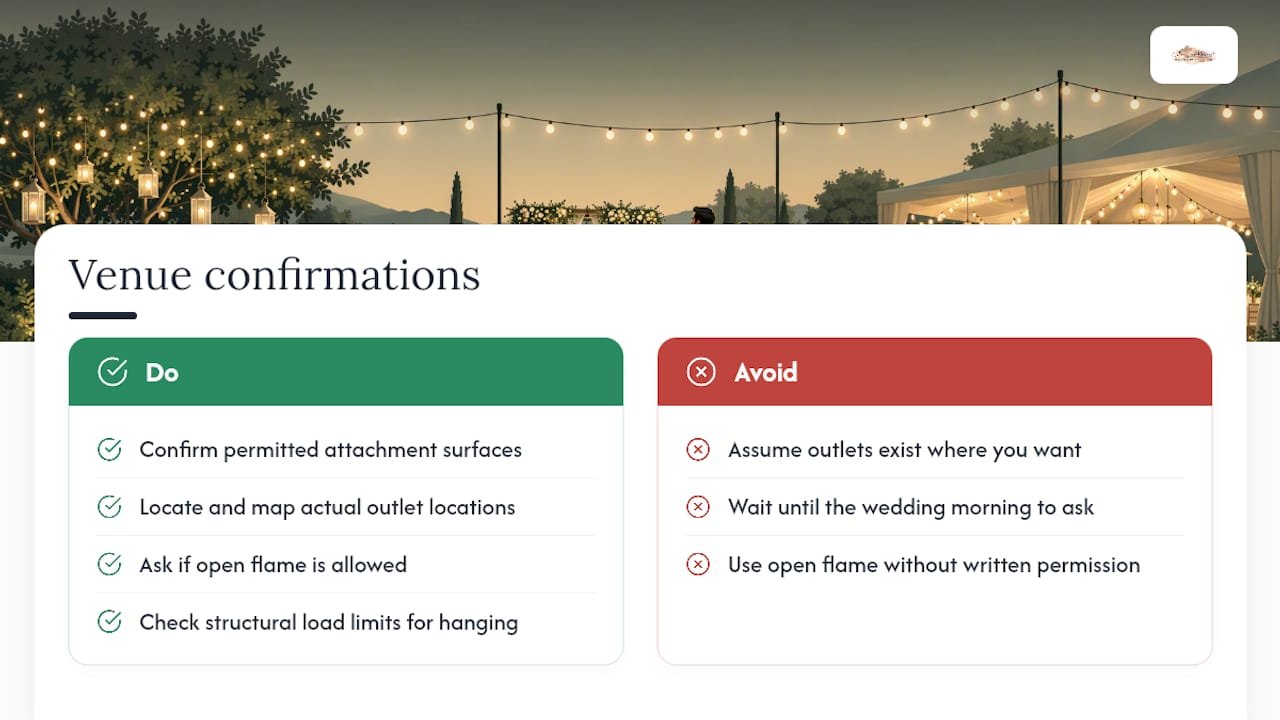
Every outdoor lighting plan depends on decisions your venue makes, not just decisions you make. Before finalizing anything, ask what surfaces you’re allowed to attach lights to, where the actual outlets are located, whether open flame is permitted anywhere on the property, what load limits apply to any structure you want to hang from, and what the tenting or rain plan looks like if weather turns.
A venue’s existing features change your entire lighting approach. Mature trees give you natural anchor points for string-light canopies that a bare field simply doesn’t offer. Onsite lodging changes how late your lighting needs to stay functional, since a wedding weekend with guests staying overnight extends your lighting needs well past the reception’s final song. A pool adds an entire lighting opportunity through floating candles or underwater LED options that a landlocked ceremony site never gets.
Rain plans deserve their own line item. Backup tenting, power routing that stays protected if the ground gets wet, and battery-powered lighting as a fallback for anything wired all belong in your rain plan for an outdoor wedding conversation with your venue, ideally weeks before the event, not the morning of.
The One Thing Most Lighting Guides Get Wrong
Most advice on outdoor wedding lighting treats it as a pure design problem: pick pretty lights, hang them, done. That framing skips the part that actually determines whether the evening goes smoothly, which is the logistics conversation with your venue and your electrician.
The conventional wisdom oversells variety. Pinterest boards showing eight different lighting styles in one reception space look impressive as static photos, but in person that much visual competition reads as busy rather than romantic. The couples who get the best results almost always simplified down to one anchor and one supporting layer, then spent their remaining budget on making that combination flawless rather than adding a third or fourth element.
If there’s one thing to prioritize first, it’s confirming power and attachment rules with your venue before you fall in love with a specific look. A gorgeous fairy-light canopy design means nothing if the venue won’t let you drill into its trees or doesn’t have the circuit capacity to run it. Logistics should shape the design, not get bolted on afterward.
— Luis
A Venue That Simplifies the Lighting Logistics for You
If everything above sounds like a lot to coordinate on top of planning a wedding, that’s because it is, and it’s exactly the kind of complexity a venue with built-in event infrastructure removes from your plate. A venue with outdoor ceremony and reception spaces set up for layered lighting, paired with onsite lodging for a limited number of guests, can help ensure your wedding weekend continues after the string lights get unplugged.

Instead of negotiating attachment rules and outlet locations with an unfamiliar site, you might choose a venue specifically designed for outdoor mountain weddings, where natural and built features suit string-light canopies and uplighting. Onsite lodging options can allow family and friends to stay for the full weekend, extending a single-day event into a multi-day gathering with amenities like a pool and hot tub between activities. If you’re picturing a North Georgia mountain wedding with the lighting logistics already accounted for, take a look at the Cherrywood Ranch venue details and check available dates for your wedding weekend.
Sources
- The Ultimate Guide to Wedding Lighting | Junebug Weddings
- Super Bright LEDs outdoor patio string lights product page
- The Knot — Outdoor wedding lighting ideas
- Brides — string lights and outdoor wedding gallery
- Walmart product listing for 200ft outdoor string lights (DELight/Yescom style)