
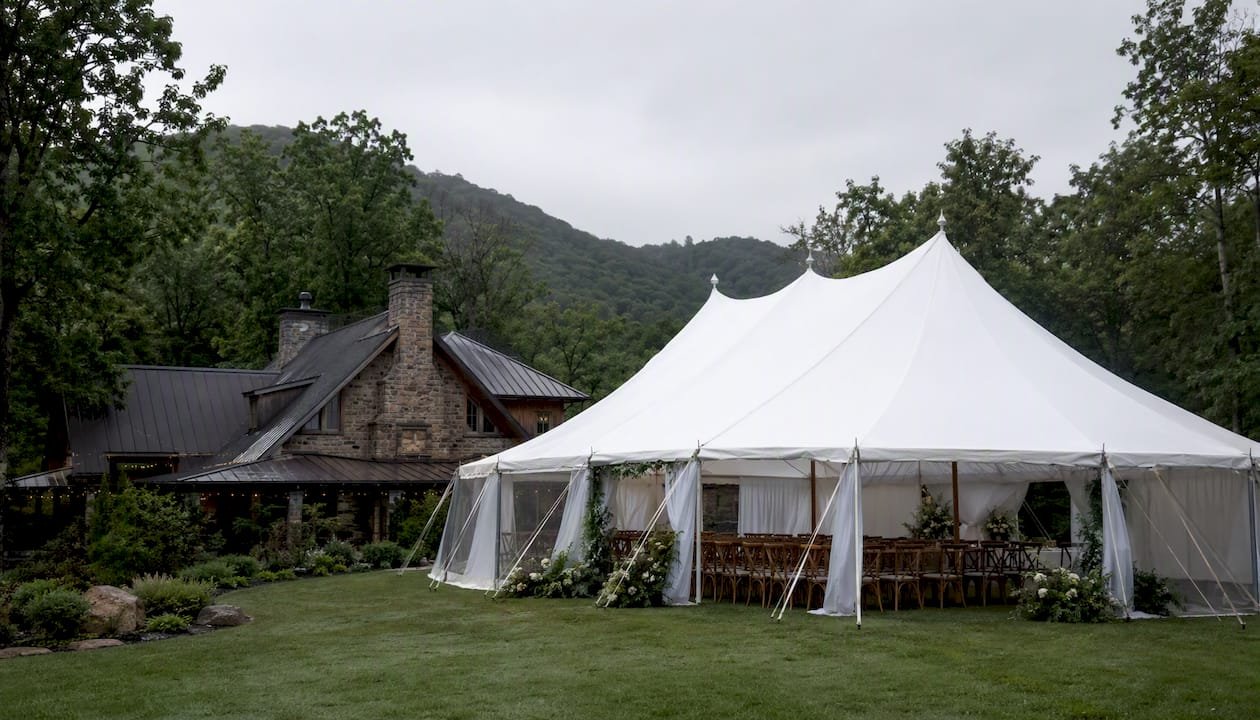
Your rain plan for an outdoor wedding should be a fully documented, genuinely loved alternative — not a reluctant fallback. Think of it as Plan A2: a version of your day you’d be happy to run from the start.
Three things to do this week:
- Ask your venue whether an indoor space is available on your date, what its capacity is, and whether there’s a fee to access it.
- Reserve a tent or place a tent hold if your venue has no indoor option or if the indoor space feels like a downgrade.
- Designate a decision-maker now — your planner, coordinator, or a trusted point person who will make the go/no-go call so you don’t have to on the morning of your wedding.
What to confirm before you leave this week: indoor capacity at your venue, tent availability from local rental companies, and whether your key vendors (caterer, photographer, florist) have flexibility to pivot. The Knot reports that most couples host an outdoor ceremony, which means most of them need exactly this plan.
Key Takeaways
A solid outdoor wedding rain plan treats Plan A2 as an equally beautiful option, assigns a single decision-maker, and gets every vendor briefed before the wedding week.
| Point | Details |
|---|---|
| Document Plan A2 early | Reserve your indoor space or tent hold at the same time you book the venue. |
| Assign a decision-maker | Give your planner or coordinator pre-approved rules so they make the call without interrupting you. |
| Brief all vendors in advance | Distribute the Plan A2 layout to every vendor at least 30 days out. |
| Budget a weather fund | Set aside a contingency amount for day-of items like umbrellas, runners, and last-minute rentals. |
| Stage guest comfort items | Clear umbrellas, heel protectors, and towel stations make rain feel intentional, not improvised. |
Table of Contents
- What are your best backup options for an outdoor wedding?
- Who makes the call, and when?
- How do logistics change when you switch plans?
- What should you budget and book for weather contingencies?
- What guest comfort items make rain feel intentional?
- How do you get great photos when it rains?
- What safety and flooring issues should you plan for?
- Your printable rain-day checklist and timeline
- What do planners and venues say about backup plans?
- Why Plan B should feel like part of the experience
- Sources
What are your best backup options for an outdoor wedding?
Three main backup types cover almost every outdoor wedding scenario: a venue’s existing indoor space, a rented tent, or a hybrid that splits the event between both. Each one protects you differently.
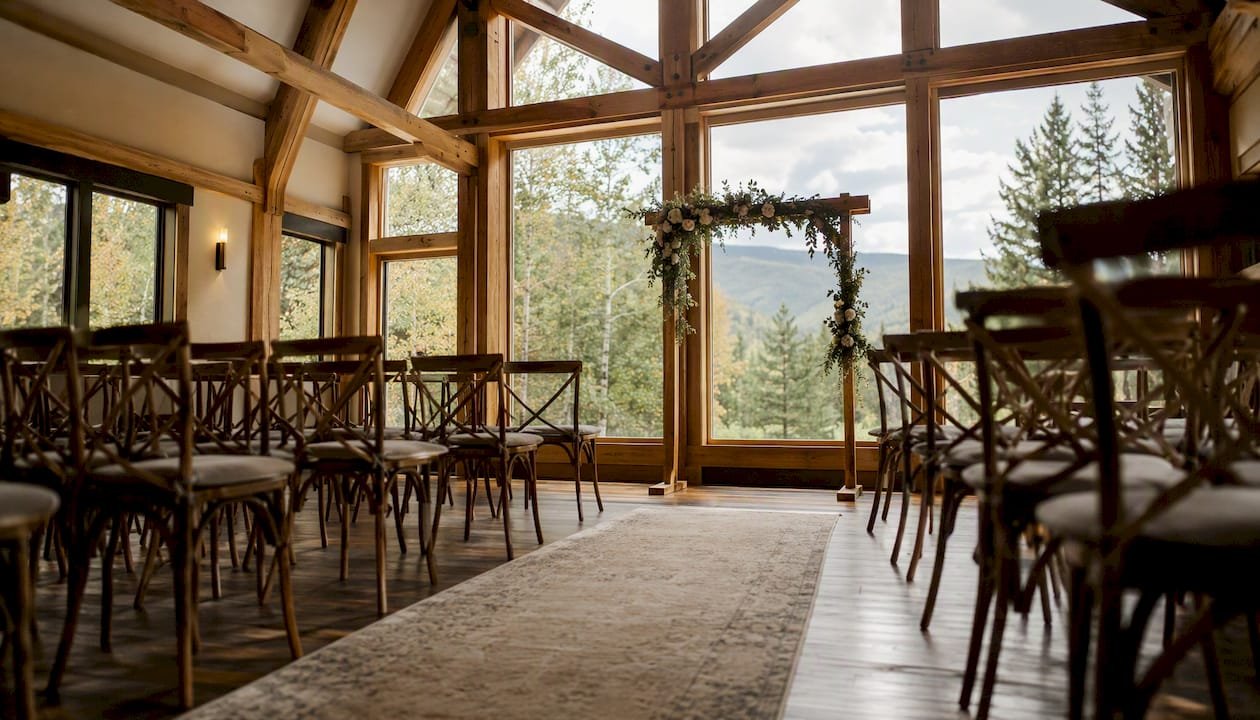
Indoor backup space
Moving the ceremony or reception inside an existing structure — a barn, a lodge, a great room — is the cleanest option when the space is genuinely beautiful. No rental logistics, no weather-proofing headaches, and your vendors already know the layout. The catch: indoor capacity is often smaller than the outdoor footprint, so seating configurations may need to change, and natural light for photography drops significantly.
Rented tent
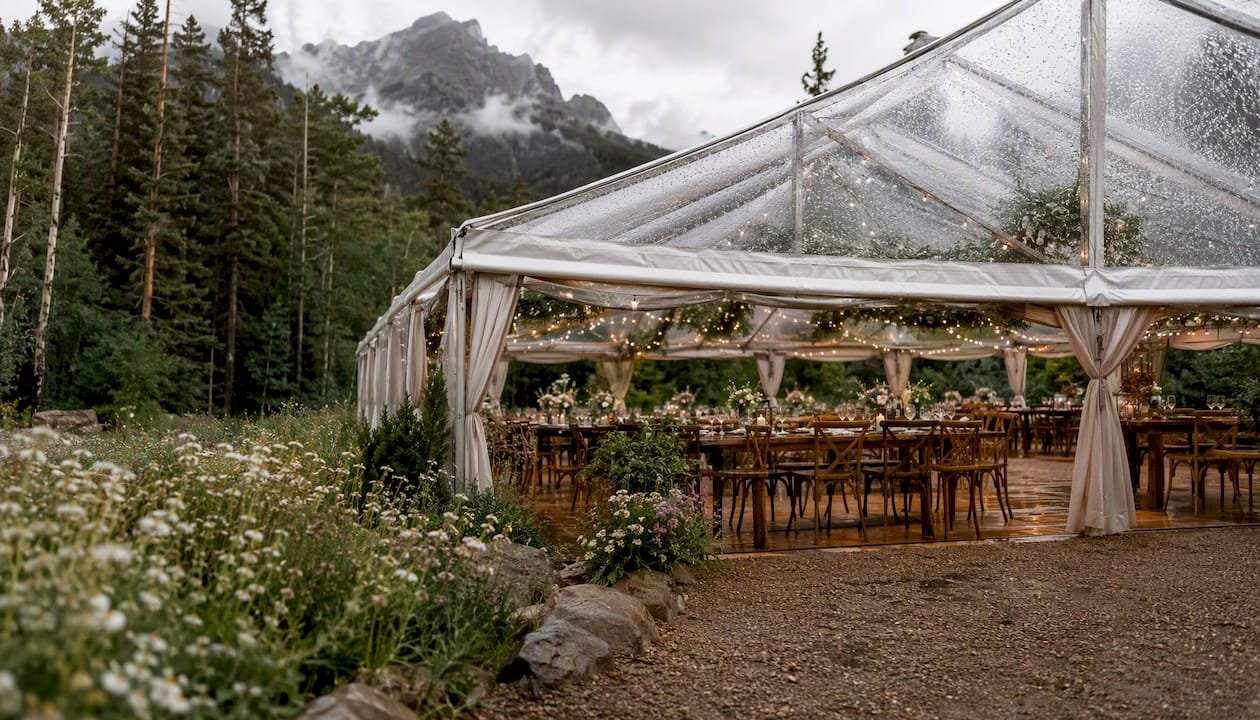
A tent gives you the outdoor feel with a roof overhead. Clear-top tents preserve sky views and photograph beautifully even in rain. Frame or pole tents are more economical and handle wind better. The tradeoff is cost and lead time: a tent with sidewalls, flooring, lighting, and climate control adds up fast, and peak-season availability disappears months in advance.
Hybrid flow
Split the event: ceremony under a covered structure or tent, cocktail hour inside, reception back under the tent once it’s set. This works well when your venue has a mix of covered and indoor spaces. It requires more vendor coordination and clear guest-flow signage, but it can preserve the outdoor aesthetic for the moments that matter most photographically.
Comparison at a glance:
| Option | Guest experience | Photography | Typical cost add | Lead time needed |
|---|---|---|---|---|
| Indoor backup | Comfortable, intimate | Reduced natural light | Low to none | Book at venue tour |
| Clear-top tent | Outdoor feel, sky visible | Excellent | Moderate to high | 6 months out |
| Pole/frame tent | Functional, flexible | Good with added lighting | Moderate | 4–6 months out |
| Hybrid flow | Best of both | Strong for key moments | Moderate | 4–6 months out |
Pro Tip: Planner Jessyca Canal recommends touring venues where you genuinely like both the indoor and outdoor options. If the indoor space feels like a consolation prize on the tour, it will feel like one on the wedding day too.
Who makes the call, and when?
The go/no-go decision has a timeline. Make it before the wedding week, not during it.
30 days out: Confirm your backup option is reserved and all vendors know it exists. No decisions yet, just confirmation.
7–10 days out: Check the extended forecast. If a storm system is tracking toward your date, alert your vendor team so they can mentally prepare for the pivot.
3–5 days out: Weather models become meaningfully accurate at this range.
48 hours out: This is the primary decision window. Plan A Wedding advises that the final setup call is commonly made 24–48 hours before the event. At this point, your decision-maker should be running the call based on forecast probability, ground saturation, and vendor setup time requirements — not waiting for certainty that will never come.
Morning of: A final check for lightning, sustained wind above 25–30 mph, or flooded access routes. These are safety triggers, not comfort preferences. If any apply, the backup activates regardless of forecast improvement.
Who should make this call? Your planner or day-of coordinator, not you. Pre-approve the decision rules together in advance: what rain probability threshold triggers the switch, what safety conditions require it, and what vendor setup time constraints make a last-minute pivot impossible. WeddingClever notes that assigning a day-of weather captain who monitors forecasts 72–48 hours out and communicates through a single channel prevents the cascade of conflicting calls that derails vendor teams.
Pro Tip: *Write the decision rules into your vendor contracts and your day-of timeline.
How do logistics change when you switch plans?
Switching from outdoor to indoor or tented isn’t just moving chairs. It’s a choreographed vendor pivot with a tight window.
Who needs to know, and in what order:
- Venue coordinator first — they control access, setup time, and any fees for the indoor space.
- Tent rental company if a tent is being erected or sidewalls are being added.
- Caterer — kitchen access, serving flow, and table layout all change indoors.
- Photographer and videographer — lighting plan, shot list, and first-look location shift entirely.
- Florist — centerpiece heights, arch placement, and aisle design may not translate directly to the new footprint.
- AV and lighting vendor — power access, speaker placement, and ambient lighting all need to be re-mapped.
- Officiant — confirm the new ceremony location and any acoustic adjustments.
- Transportation — pickup and drop-off points may change if the entrance shifts.
Layout changes are the part most couples underestimate. An outdoor ceremony axis (typically facing a view or natural backdrop) rarely maps cleanly onto an indoor room. The altar position, guest seating orientation, and aisle length all need to be pre-sketched for the indoor space before the wedding week. BlueLlama’s planning guide emphasizes that moving indoors changes timelines, vendor choreography, and photography needs — and that couples who pre-approve the indoor layout avoid the scramble entirely.
Power and staging matter too. Tents require a generator or a venue power hookup; confirm the amperage your AV vendor needs. Load-in routes for tents and rentals often differ from the main guest entrance, so map those separately. If flooring is being laid, it goes in before everything else.
What should you budget and book for weather contingencies?
WeddingClever’s industry estimates put roughly 1 in 5 outdoor weddings facing some form of weather disruption. That’s a real enough probability to justify a line item in your budget.
Where the money goes:
- Tent base rental: Varies widely by size, region, and style. A basic pole tent for 50–75 guests runs less than a clear-top frame tent for the same count. Get quotes from at least two local rental companies.
- Sidewalls: Usually priced separately. Budget for them even if you hope not to use them.
- Flooring: Temporary dance floors or interlocking panels over grass or gravel. Not optional if your venue has soft ground.
- Climate control: Heaters for fall/winter, fans or portable AC for summer. Often rented separately from the tent itself.
- Labor and delivery: Setup and teardown fees can equal 20–30% of the tent rental cost.
For reservation timing, place a tent hold as early as you book your venue — especially for May through October dates in the Southeast. Holds are typically free or low-cost and give you first right of refusal. Convert the hold to a confirmed reservation 60–90 days out.
Wedding insurance is a separate layer of protection. Weather-related coverage typically reimburses non-refundable vendor deposits if an event is postponed due to extreme weather (think hurricane or tornado, not a rainy afternoon). Most policies must be purchased well before the wedding date — often 14 to 30 days out at minimum, and some require purchase at the time of booking. Read the policy language carefully: “cancellation due to weather” usually requires a documented, severe event, not general rain. Cherrywood Ranch’s destination wedding budgeting guidance recommends setting aside a discretionary bad-weather fund alongside any insurance policy.
Pro Tip: Set aside a flat contingency amount — a few hundred dollars — specifically for day-of weather items: extra umbrellas, towels, floor runners, and last-minute rentals. This fund is separate from your tent budget and covers the small things that make a rainy day feel handled.
What guest comfort items make rain feel intentional?
The difference between a rainy wedding that feels chaotic and one that feels charming is almost entirely in the details couples staged in advance. Brides recommends preparing clear umbrellas, heel protectors, and towels as day-of essentials for any outdoor event.
Guest kit ideas:
- Clear umbrellas in a basket at the entrance — they photograph beautifully and don’t block faces.
- Heel protectors (small rubber caps that slip over stilettos) at the escort card table or in a labeled basket near the entrance.
- Blankets or wraps for evening ceremonies in cooler months, folded on chairs or in a crate near the entrance.
- Hand warmers tucked into favor bags or offered at a welcome station for fall and winter dates.
- Towel station near the entrance so guests can dry off before sitting.
- Drying rack or umbrella stand so wet umbrellas don’t drip through the reception space.
Staging matters as much as the items themselves. A basket of clear umbrellas with a small handwritten sign (“Just in case — take one, keep it”) reads as thoughtful rather than panicked. Matching umbrella colors to your palette turns a practical item into a design element.
For guest flow, covered paths between spaces are worth the investment. Even a simple canopy connecting the parking area to the ceremony site keeps guests from arriving soaked. Clear signage at every transition point (“Ceremony this way,” “Reception inside”) prevents the confused cluster that forms when guests don’t know where to go in the rain.
How do you get great photos when it rains?
Rain photography is genuinely beautiful — but it requires a different shot list and a different timeline than a sunny day.
Before the ceremony:
- Move the first look earlier, ideally before any weather window. If rain is forecast for mid-afternoon, schedule portraits at 11 AM.
- Identify covered alcoves, porches, barn doors, and interior windows at your venue during the site visit. These become your primary portrait locations on a rain day.
- Puddle reflections, rain-streaked windows, and overcast light all produce softer, more cinematic images than harsh midday sun. Brief your photographer on this framing before the day.
During the ceremony:
- A clear-top tent or covered porch keeps the ceremony dry while preserving natural light.
- If moving fully indoors, your photographer needs to know the new ceremony axis and lighting setup at least 24 hours in advance to plan flash or supplemental lighting.
Photographer checklist for rain days:
- Waterproof camera covers and lens cloths staged and accessible.
- Backup flash units charged and ready for low-light indoor spaces.
- Shot list adjusted to include umbrella portraits, covered-space portraits, and any scenic venue features that hold up in rain.
- Confirm with the couple: are they willing to step outside briefly for a rain portrait? Some of the most memorable wedding photos come from five minutes in the drizzle.
Pro Tip: If your venue has a scenic natural feature — a waterfall, a mountain view, a covered bridge — rain often enhances it. A waterfall runs fuller after rain. Brief your photographer on these spots so they’re on the shot list regardless of weather.
What safety and flooring issues should you plan for?
Rain introduces hazards that go beyond aesthetics. Address them before the day.
Flooring:
- Grass and gravel become slippery and muddy fast. Temporary interlocking flooring panels or wooden dance floors laid over soft ground protect dresses, shoes, and guests with mobility challenges.
- Aisle runners on wet grass slide. Use a hard-surface runner or secure fabric runners with stakes and weights.
- Tent flooring should extend beyond the tent perimeter slightly so guests aren’t stepping from dry floor onto mud at the entrance.
Electrical and AV:
- All outdoor electrical connections should use GFCI (ground fault circuit interrupter) outlets or adapters. This is non-negotiable near water.
- Generators should be placed on level, dry ground away from tent sidewalls and guest areas, with exhaust directed away from enclosed spaces.
- AV cables running across wet ground need waterproof covers or should be routed overhead.
Safety checklist:
- Lightning: If lightning is within 10 miles, move everyone indoors or into a hard-sided structure. Tents do not provide lightning protection.
- Wind: Sustained winds above 25–30 mph can compromise tent stability. Know your tent company’s wind rating and have a plan for early teardown if conditions deteriorate.
- Saturated ground: Tent stakes lose holding power in saturated soil. Your rental company should assess ground conditions during setup and add ballast weights if needed.
- Access routes: Check that vendor load-in routes and guest parking areas don’t flood. A flooded access road can delay or prevent vendor arrival entirely.
Pro Tip: Ask your tent rental company for their weather policy in writing: at what wind speed do they recommend striking the tent, and who makes that call? Having this documented prevents a dispute at 6 PM on your wedding day.
Your printable rain-day checklist and timeline
Run this checklist with your planner or coordinator. Print it, share it, and assign each item to a named person.
30 days out
- Confirm indoor backup space is reserved and capacity is documented.
- Convert tent hold to confirmed reservation (or place hold if not yet done).
- Distribute Plan A2 layouts to all vendors: caterer, photographer, florist, AV, officiant.
- Confirm vendor flexibility clauses in contracts (can they pivot with 48 hours’ notice?).
- Purchase wedding insurance if not already in place.
7 days out
- Check extended forecast. If rain probability is above 40%, send a soft heads-up to your vendor team.
- Confirm tent setup date and access window with rental company.
- Update wedding website with a note: “We have a beautiful backup plan in place — details to follow if needed.”
- Confirm guest communication channel (group text, app, or website update).
48 hours out
- Final weather check. Decision-maker reviews forecast and activates Plan A2 if thresholds are met.
- Notify all vendors of the confirmed plan (A or A2) via a single group message.
- Notify guests via wedding website update or group text: “We’re moving to our covered space — same time, same place, same party.”
- Confirm flooring and tent sidewalls are staged for installation.
Day of
- Stage umbrella baskets and heel protector stations at entrance.
- Lay floor runners and confirm aisle is secure.
- Confirm generator is fueled and GFCI connections are in place.
- Brief wedding party on new ceremony layout and photo locations.
- Assign one person to monitor weather during the event and communicate with the venue coordinator.
Notification timing guide:
| Checkpoint | Who to notify | Method |
|---|---|---|
| 7 days out | Vendor team | Email or group text |
| 48 hours out | Vendor team + guests | Group text + website update |
| Morning of | Wedding party + guests | Direct text or site note |
What do planners and venues say about backup plans?
The most consistent advice from experienced planners is simple: love your backup plan before you need it.
On venue tours, ask these questions directly:
- What is the indoor capacity, and does it match your outdoor guest count?
- Is there an additional fee to access the indoor space on the day?
- What is the setup time required to transition from outdoor to indoor?
- Are there separate load-in routes for vendors and guests?
- Does the venue have a preferred tent rental vendor, and can you place a hold through them?
A venue that can’t answer these questions clearly on the tour is a venue that hasn’t thought through its own rain plan. That’s a signal worth taking seriously.
Cherrywoodranchweddingvenue addresses this directly in its all-inclusive model: outdoor ceremony and reception spaces in the North Georgia Mountains, onsite lodging for up to 16 guests, and coordinated event management that includes pre-approved backup logistics. When the whole wedding party is staying on-site, a weather pivot doesn’t mean scrambling for transportation or losing guests to a hotel lobby. The group stays together, the party continues, and the coordinator manages the transition. The scenic venue features — mountain views, natural surroundings — hold up in rain and often photograph better under overcast skies than in harsh afternoon sun.
Why Plan B should feel like part of the experience
There’s a version of rain-plan advice that treats backup logistics as damage control. I’d push back on that framing pretty hard.
The couples who walk away from a rainy wedding day genuinely happy are almost always the ones whose backup plan was designed, not defaulted into. They toured the indoor space and said “actually, this is beautiful.” They chose the clear-top tent because they wanted the sky visible regardless of weather. They put the umbrellas in a basket that matched their color palette. The rain didn’t ruin their vision — it activated a version of it they’d already approved.
At Cherrywoodranchweddingvenue, the all-inclusive weekend model makes this easier than it sounds. When your guests are staying on-site in the North Georgia Mountains, a weather pivot is a logistical adjustment, not a crisis. The coordinator knows the property, the vendors know the indoor layout, and the wedding party is already there. A covered transition from ceremony to reception becomes part of the day’s rhythm rather than an interruption to it. That’s what a well-designed destination wedding venue actually provides: not just a beautiful outdoor space, but a team and a property that can hold the whole experience together when the weather has other ideas.
If you’re planning an outdoor ceremony in the mountains and want to walk through both your outdoor and indoor options before you commit, check availability at Cherrywoodranchweddingvenue and ask specifically about the backup logistics on your tour. The answer will tell you everything you need to know about whether the venue has actually thought this through.

Sources
- Your Guide to Creating an Outdoor Wedding Rain Plan
- Wedding Weather Contingency Planning Guide | Plan A Wedding
- Wedding Weather Backup Plans: Rain & Storm Contingency Guide
- Outdoor Wedding Rain Plan: How to Transition Your Wedding Indoors Without Stress
- What to Do If It Rains on Your Wedding Day