Here are 8 outdoor reception ideas you can start planning right now: garden party, vineyard, beach or lakeside, mountain multi-day, rooftop terrace, backyard, woodland or forest, and desert oasis. The single most practical next step is to walk your site this week and check three things before you book anything else.
This week’s immediate checklist:
- Test the ground footing where you want to dance and dine (soft, uneven, or sloped ground changes your flooring budget fast)
- Sketch a primary lighting plan, even rough, so you know where power needs to run
- Decide whether you need a rented dance floor (rule of thumb: a moderate amount of space suitable for your guest count)
The eight categories below cover every major outdoor wedding theme. Pick the one that fits your site, then use the logistics sections that follow to build out the details.
Pro Tip: Before you fall in love with a theme, confirm your site’s footing, shade situation, and whether local permits apply. Theme selection is free; retrofitting a site that can’t support your vision is not.
Key Takeaways
The most effective outdoor receptions treat the existing landscape as the primary design asset and invest first in lighting, stable flooring, and guest comfort.
| Point | Details |
|---|---|
| Site assessment first | Check footing, slope, and power access before committing to any theme or vendor. |
| Dance floor sizing | Plan 150–200 sq ft for roughly 100 guests; add a subfloor on soft or uneven ground. |
| Layer your lighting | Run ambient canopy lights first, then path lighting, then accent focal points. |
| Tent accessory budget | Budget 20–30% above the tent rental cost for flooring, sidewalls, and climate control. |
| Cherrywoodranchweddingvenue | Offers a private North Georgia mountain weekend with onsite lodging, outdoor reception spaces, and multi-day packages for 25–75 guests. |
Table of Contents
- 1. Nine outdoor reception themes that fit real venues
- 2. How to layer outdoor lighting for daytime-to-night transitions
- 3. Dance-floor and flooring solutions for every outdoor surface
- 4. Seating, zoning, and flow that make a field feel like connected rooms
- 5. Table decor and centerpieces that survive wind and photograph well
- 6. Food and beverage ideas built for outdoor receptions
- 7. Weather, permits, and guest comfort: the full logistics checklist
- 8. Budget-friendly swaps and safe DIY ideas
- 9. Vendor timeline and booking checklist
- 10. How mountain and multi-day weddings change outdoor reception planning
- What site-first planning actually means for your reception
- Cherrywoodranchweddingvenue: a private mountain weekend with everything onsite
- Sources
1. Nine outdoor reception themes that fit real venues
The best outdoor receptions let the existing landscape carry the mood, then add intentional touches for guest comfort. Designers consistently reinforce this: work with the site, not against it. Here is how each theme translates to a real outdoor space.
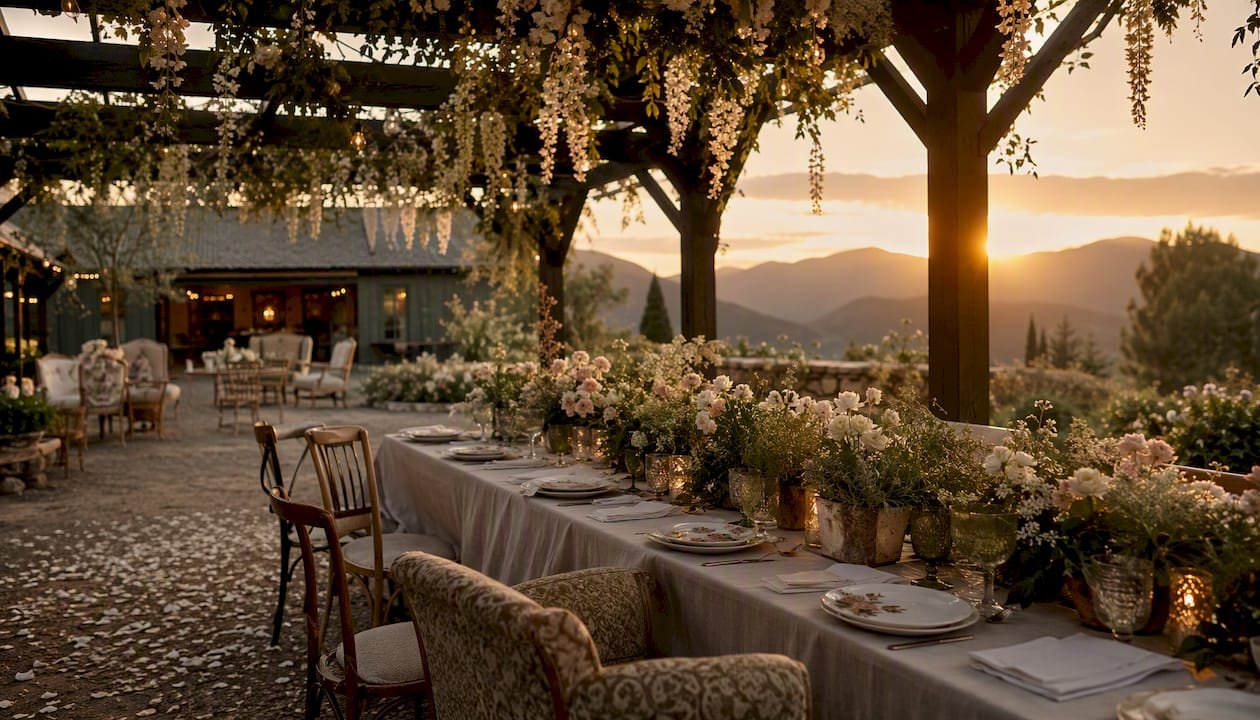
Garden party. Lush florals, low hedgerows, and a mix of round tables and lounge clusters define this look. Key visual anchors are a floral arch or pergola, mismatched vintage china, and a soft pastel palette. Do: use potted herbs as centerpieces that double as guest favors. Don’t: plant tall floral towers on exposed tables where wind can topple them. Photo moment: a long table under a rose-covered pergola at golden hour.
Vineyard. Rows of barrels, wine-barrel cocktail tables, and warm Edison bulbs strung between posts. The palette is deep burgundy, sage, and terracotta. Do: use the existing row structure to guide guest flow. Don’t: ignore afternoon sun on west-facing sites; add shade sails or schedule dinner after 5 PM. Photo moment: couple walking the vine rows at dusk with string lights behind them.
Beach or lakeside. Driftwood, sea glass, and natural linen create the look without feeling kitschy. Do: rent a firm-surface dance floor rated for sand, since dancing on loose sand is exhausting and unsafe. Don’t: use tall centerpieces in coastal wind. Photo moment: ceremony chairs lined up facing the water with a simple floral arch.
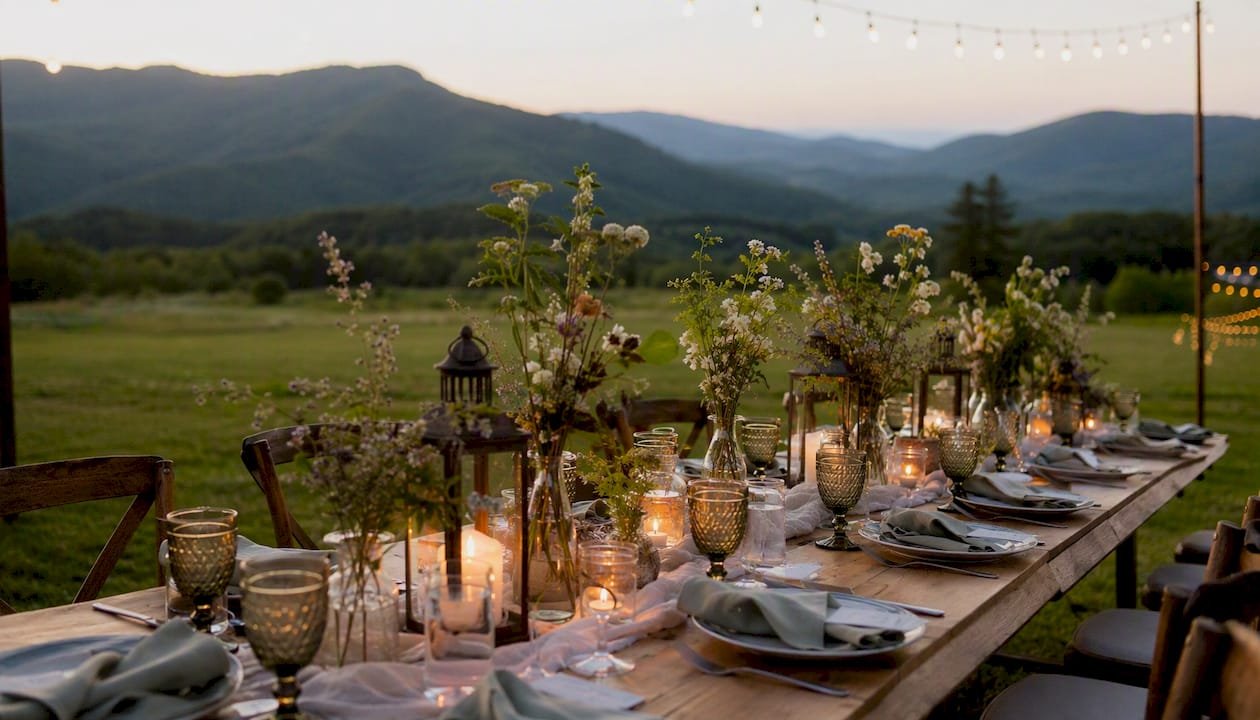
Mountain multi-day. This theme rewards a weekend format. Wildflowers, stone, and raw wood are the visual anchors. The multi-day pacing moves from intimate rehearsal dinner to open-air reception to a second-morning brunch, giving guests time to absorb the setting. Do: plan for temperature swings of 15–20°F between afternoon and evening. Don’t: skip a weather contingency for the ceremony space. Photo moment: couple silhouetted against a mountain ridgeline at sunset.
Rooftop terrace. City skyline as backdrop, geometric planters, and a clean modern palette. Do: confirm load limits with the building manager before booking any flooring or tent system. Don’t: underestimate wind at elevation; secure every linen and centerpiece. Photo moment: first dance with the city lit up behind the couple.
Backyard. The most personal option and often the most budget-flexible. Area rugs, string lights on poles, and a mix of borrowed and rented furniture create the look. Do: walk the yard after rain to check drainage. Don’t: skip a generator plan; residential power rarely handles catering equipment plus a DJ plus lighting. Photo moment: a sweetheart table framed by a DIY floral arch against a garden fence.
Woodland or forest. Moss, ferns, lanterns hung from branches, and long farm tables under a canopy of trees. Do: check for overhead dead branches before hanging anything. Don’t: use open-flame torches without a fire safety plan and local permit. Photo moment: a candlelit table runner stretching down a long table with tree trunks as the backdrop.
Desert oasis. Terracotta, succulents, dried pampas grass, and warm amber lighting. Do: plan shade structures for afternoon heat; guests in direct desert sun become uncomfortable fast. Don’t: use fresh florals that wilt in high heat; lean on dried and preserved arrangements instead. Photo moment: a low lounge area with layered rugs and lanterns against a sunset-lit rock formation.
Barn with outdoor floor. The barn provides shelter and a focal point; the outdoor floor extends the party into the open air. Do: connect the two spaces with a lit pathway so guests move naturally. Don’t: skip a flooring plan for the outdoor section; grass adjacent to a barn is often soft from foot traffic and drainage. Photo moment: open barn doors framing the outdoor dance floor lit by string lights overhead.
2. How to layer outdoor lighting for daytime-to-night transitions
Lighting is the highest-impact investment for an outdoor reception. Pro planners note it changes mood, improves photos, and increases perceived value more than most large floral installations. The approach that works is three layers, in this order.
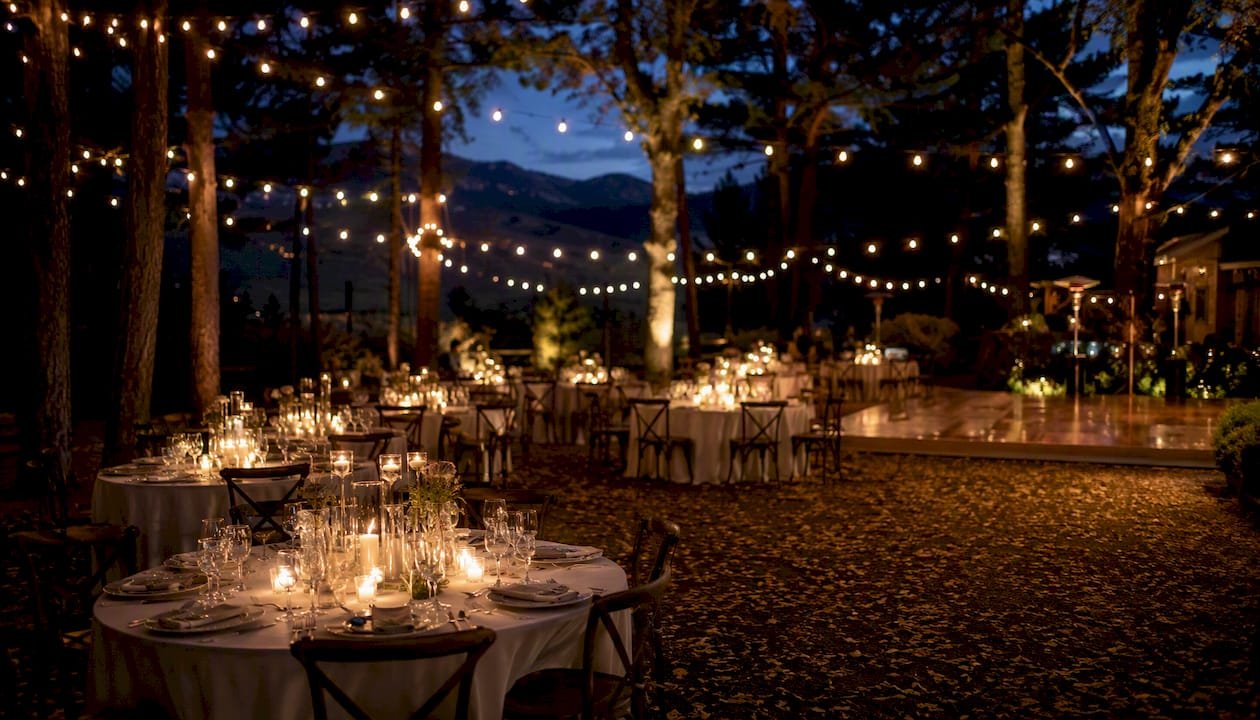
Layer 1: Ambient canopy. String lights or market lights strung overhead across dining and dance areas. This is your base layer. Run them at 8–10 ft above table height for the warmest effect. Warm white (2700K–3000K) reads better in photos than cool white.
Layer 2: Task and path lighting. Low-voltage path lights, uplighting at tent poles, and table candles in hurricane glass. This layer keeps guests safe after dark and defines circulation routes. Keep paths at least 4 ft wide and mark any grade changes with a light source.
Layer 3: Accent and focal points. Uplighting in trees, a chandelier inside a tent, or a lit floral installation at the sweetheart table. This layer is where you spend selectively. One or two strong focal points outperform a dozen scattered accents.
Power and safety reminders:
- Place generators at least 20 ft from the tent and downwind of guests
- Use a licensed electrician for any hardwired installation; check local codes before the event
- Tape or cover all cable runs across walking surfaces to prevent trips
- Confirm with your rental vendor that extension cord lengths match your run distances; undersized wire causes voltage drop and outages mid-reception
Pro Tip: Order your lighting layout before you finalize the tent or table layout. Power source location determines where everything else goes. Changing it late costs money.
3. Dance-floor and flooring solutions for every outdoor surface
Always plan a stable, level wear surface for dancing and dining. A dance floor on grass requires a protective sublayer plus interlocking tiles or parquet panels to spread loads and prevent sinking. Selection depends on soil firmness, slope, and expected foot traffic.
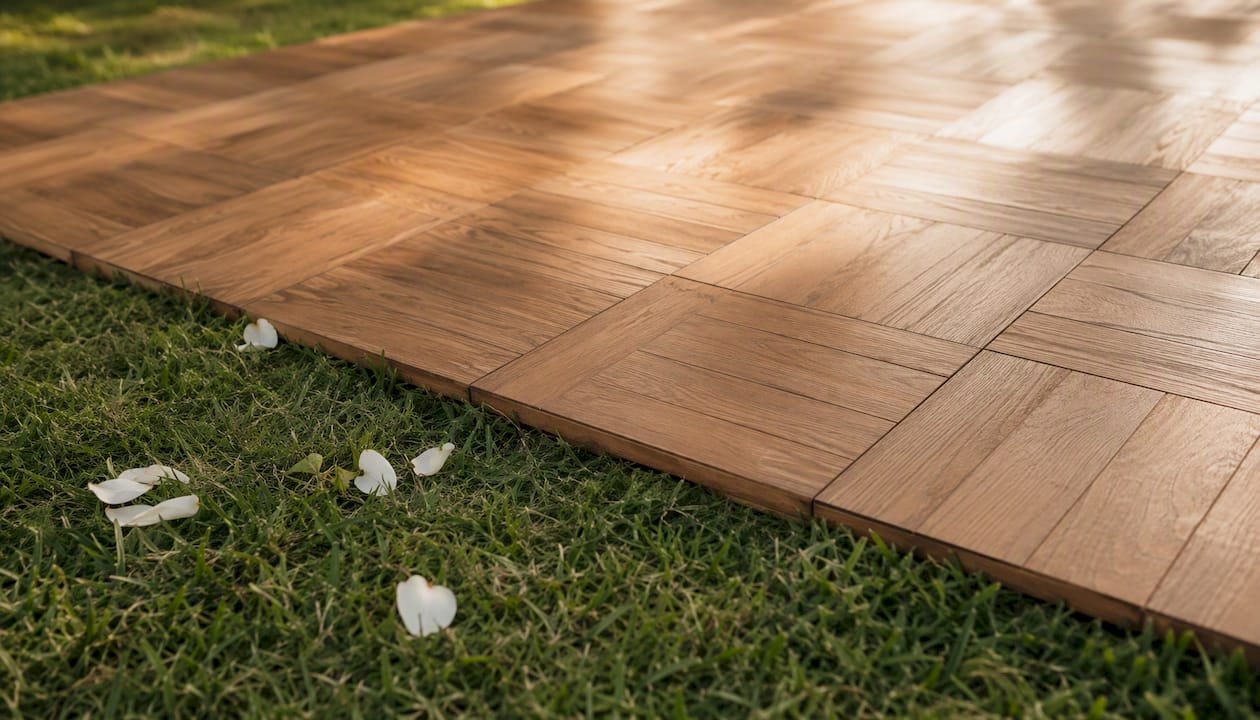
Sizing formula: Plan 150–200 sq ft for roughly 100 guests. For a 150-guest wedding with a live band, add 100–150 sq ft for band gear and speaker placement. A 20 x 20 ft floor (400 sq ft) handles 150–175 active dancers comfortably.
| Surface | Recommended flooring | What it protects | Typical install time | Visual notes |
|---|---|---|---|---|
| Firm grass | Interlocking parquet or modular vinyl | Turf, load distribution | 2–4 hours | Warm, classic look |
| Soft or wet grass | Subfloor + parquet panels | Turf, prevents sinking | 4–6 hours | Requires level check |
| Compacted sand | Modular plastic tiles or composite mats | Stability, sand migration | 2–3 hours | Clean, modern look |
| Loose sand | Raised platform + subfloor | Stability, drainage | 6–8 hours | Requires staking |
| Gravel | Composite mats or plywood subfloor | Level surface, foot safety | 3–5 hours | Best covered by tent |
| Uneven slope | Leveling shims + subfloor + parquet | Safety, level surface | 6–10 hours | Requires site survey |
| Concrete patio | Vinyl wrap or area rugs | Aesthetics, comfort | 1–2 hours | Easiest install |
Site-assessment checklist before booking flooring:
- Walk the site and measure the slope; more than 1 inch of variance over 10 feet requires a leveled subfloor
- Locate all irrigation heads and sprinkler lines; mark them before any staking
- Confirm delivery vehicle access (most floor systems arrive on pallets)
- Do a soil firmness test: push a 12-inch stake 6 inches into the ground; if it goes in with hand pressure alone, the soil is too soft for tiles without a subfloor
- Get written vendor approval for the install method before signing a rental contract
Install the dance floor before the tent goes up when possible. It is far easier to level and adjust panels without tent poles in the way, and the tent crew can then stake around the floor perimeter cleanly.
4. Seating, zoning, and flow that make a field feel like connected rooms
Distinct zones defined by furniture, rugs, and lighting are what separate a polished outdoor reception from a field with tables in it. The goal is to give guests a reason to move and a place to land when they do.
Zone layout options:
- Horseshoe or U-shape dining: Works well for 50–80 guests; keeps the dance floor visible from every seat and creates a natural focal point at the open end
- Long communal tables: Best for 30–60 guests; creates intimacy and works beautifully in woodland or vineyard settings where the table length mirrors the natural lines
- Round-table clusters with lounge zones: Best for 80–150 guests; scatter lounge furniture (sofas, low chairs, side tables) between dining clusters to break up the space and give non-dancers somewhere comfortable to go
Service path requirements: Keep 4–6 ft service lanes between table rows for catering staff. Clear ramp access for ADA compliance is not optional; confirm with your venue or local authority whether a temporary ramp is required for any grade changes between zones.
Wind-proofing your layout:
- Use low centerpieces (under 12 inches) on exposed tables
- Weight vessels with sand or water-filled bases
- Clip or pin linens with table clamps, not just tuck them
- Position the bar zone with its back to the prevailing wind direction so napkins and menus stay put
A lounge zone near the bar keeps guests from clustering at the bar itself, which frees up service flow. A quiet or kids’ corner with lower lighting and softer seating gives families a place to step away without leaving the party.
5. Table decor and centerpieces that survive wind and photograph well
Low, weighted centerpieces plus protected flame alternatives are the right starting point for outdoor tables. Practical decor for outdoor receptions emphasizes low, grounded arrangements, layered textures, and one strong focal point rather than many tall installations that struggle in wind.
Material choices that hold up outdoors:
- Ceramic and terracotta vessels: heavy enough to stay put, photograph with warm texture
- Weighted metal lanterns with LED candles: wind-safe and battery-powered options eliminate open-flame permits
- Faux-greenery garlands for long tables: no wilting, no wind damage, and they read as lush in photos
- Hurricane glass for real candles: the only safe way to use open flame on an outdoor table in any breeze
Wind-smart composition rules:
- Keep arrangements wide and low rather than tall and narrow
- Stagger groupings of bud vases and candles rather than centering one large piece
- Use a mix of heights within the low range (4–8 inches) to add visual interest without adding wind exposure
- Anchor any trailing greenery or ribbon with a small clip or pin under the vessel
Pro Tip: Position your sweetheart table so the couple faces the best natural light source (usually west-facing for golden hour). Place candles and low florals in the foreground of that shot. Your photographer will thank you, and the images will look like they cost twice as much.
For guest tables, a run of bud vases with mixed stems down the center of a long table photographs better than a single large arrangement and costs less. Reserve the greenery garlands and statement florals for the sweetheart table and the bar backdrop, where they get the most camera time.
6. Food and beverage ideas built for outdoor receptions
Station-style service and passed bites reduce guest queuing and keep people distributed across the space. Mobile bars and food stations are consistently recommended for outdoor flow because they eliminate the single-line bottleneck that plagues traditional plated service outdoors.
Menu ideas by season:
- Summer: Chilled raw bar stations, a gelato or popsicle cart, a build-your-own ceviche station, and passed cold bites (cucumber rounds, chilled shrimp skewers). Keep hot food in covered chafing dishes and limit time in direct sun to under two hours per health code standards.
- Fall and cool weather: Soup shots passed on trays, a warm carving station (prime rib, roasted turkey), a hot cider or mulled wine station, and a s’mores bar near a fire pit.
- Year-round: A late-night snack station (mini sliders, fries in paper cones) that opens after the first dance keeps energy up and guests happy through the end of the night.
Bar station ideas and placement:
- A prosecco cart near the ceremony exit doubles as a cocktail-hour welcome drink station
- A wine-tasting corner with three to four pours and a small cheese board works well for vineyard or garden themes
- A late-night coffee and dessert cart near the dance floor gives non-drinkers a reason to stay
Position bars at the perimeter of the dining zone, not the center. Guests naturally cluster around a bar; putting it at the edge keeps the middle of the space open for movement.
Permit reminder: Food trucks and open-flame cooking (wood-fired pizza ovens, hibachi stations) typically trigger a local health department permit and sometimes a fire marshal inspection. Confirm requirements with your county health department at least 60 days before the event.
7. Weather, permits, and guest comfort: the full logistics checklist
Build a three-step weather plan: monitor, deploy, and communicate. Set trigger thresholds in advance so you are not making decisions under pressure on the wedding day.
Three-step weather plan:
- Monitor: Check a 10-day forecast starting two weeks out; switch to hourly forecasts 48 hours before
- Deploy: Define the threshold that triggers moving under cover (sustained winds above 20 mph, rain probability above 60%, temperature below 50°F or above 95°F)
- Communicate: Send guests a weather update 24 hours before with any plan changes; assign one person to manage vendor notifications
Full logistics checklist:
- Tent staking: confirm with the venue whether ground stakes are permitted; some sites require water-barrel ballast instead
- Generator permits: many municipalities require a permit for generators above a certain wattage; check with your local building or fire department
- Noise ordinances: most residential and semi-rural areas have noise cutoffs between 9 PM and 11 PM; confirm the specific limit for your site and build your timeline around it
- Restroom capacity: plan one portable restroom unit per 50 guests for events over four hours; luxury restroom trailers are available for rental and are far more guest-friendly
- Parking and transport: if the site has limited parking, arrange a shuttle from a nearby lot; guest shuttle services are available in most metro areas and reduce liability for late-night driving
- Insect management: coordinate with a pest control vendor for a perimeter treatment 24–48 hours before the event; provide citronella candles or personal repellent wipes at the welcome table
Guest comfort items:
- Shade sails or umbrellas over afternoon seating areas
- Baskets of pashminas or light blankets near lounge zones for cool evenings
- A flip-flop bin or shoe station near the dance floor (guests in heels on grass will use it)
- A hydration station with infused water and a welcome drink near the entrance
Budget 20–30% above your tent rental cost for accessories like flooring, sidewalls, and climate control. That figure catches most couples off guard; build it into your initial budget rather than treating it as an add-on.
8. Budget-friendly swaps and safe DIY ideas
Prioritizing lighting, the dance floor, and key focal florals gets the most return on your budget. Everything else is a candidate for a smart swap.
Six high-impact budget swaps:
- Repurpose ceremony florals as reception centerpieces; coordinate with your florist to move arrangements during cocktail hour (saves 15–25% on total floral spend)
- Use potted plants or herbs instead of cut-flower centerpieces; guests can take them home as favors
- Rent area rugs from a home goods store instead of specialty event rentals for lounge zones
- String lights on rented market poles cost a fraction of a full lighting design package and deliver 80% of the visual impact
- Use a single statement floral installation (a floral wall or arch) and keep all other decor minimal; one strong focal point photographs better than many small ones
- Thrifted bud vases in a consistent color family create a cohesive look for under $2 per table
DIY-safe options:
- Interlocking foam or plastic tiles for a small backyard dance floor (under 200 sq ft); level the ground first and pin the edges
- A pallet lounge area with anchored rugs and throw pillows; use heat-treated pallets only (marked HT) and sand all edges
- A DIY bar backdrop using a rented pipe-and-drape frame and fabric
DIYs to avoid:
- Tall unsupported arches in any site with wind exposure; without proper anchoring, a 7-ft arch becomes a projectile
- Open-flame installations without a fire safety plan and insurance coverage
- Electrical work of any kind; always hire a licensed electrician for outdoor power runs
DIY dance floors using interlocking tiles or plywood framing are practical for small backyard events, but finish and seal any plywood surface and pin all rug edges to eliminate trip hazards. Check your homeowner’s or event insurance policy before the event; some policies exclude injuries from DIY structures.
9. Vendor timeline and booking checklist
Lock the venue and date first. Everything else follows from that confirmation.
Booking timeline by window:
- 12+ months out: Venue and date, tent rental company, caterer, and photographer
- 9–10 months out: Dance floor and flooring rental, lighting designer or rental package, officiant
- 6 months out: Band or DJ, mobile bar vendor, transportation and shuttle service
- 3 months out: Florals, furniture and linen rentals, restroom trailer if needed
- 4–6 weeks out: Confirm all vendor arrival windows and load-in sequence; submit permit applications if not already done
- 1 week out: Final weather check, confirm generator fuel delivery, send vendor day-of contact sheet
- Day of: Power test before guests arrive, lighting test at dusk the evening before if possible, emergency kit on site (extra linens, zip ties, gaffer tape, a first-aid kit)
Day-of checklist:
- Vendor arrival windows confirmed in writing
- Dance floor installed and level-checked before tent erection
- Generator tested and fueled
- All lighting circuits tested
- Guest directions and parking instructions sent
- Emergency weather contact tree activated
For multi-day events, coordinate vendor scheduling so tent and floor installation happens at least two days before the first event. That buffer absorbs delivery delays and gives you time to address any site issues before guests arrive.
Vendor-confirmation template (send 1 week out):
Hi [Vendor], confirming your arrival at [address] on [date] at [time]. Load-in access is via [entry point]. On-site contact is [name] at [phone]. Please confirm receipt and your estimated arrival window.
10. How mountain and multi-day weddings change outdoor reception planning
Mountain weekends reward multi-day pacing. Moving from a rehearsal dinner on Friday to an open-air reception on Saturday and a second-morning brunch on Sunday gives guests time to settle in, explore the setting, and recover between events. Multi-day formats ease single-day pressure and let the reception flow feel celebratory rather than rushed.
Practical mountain logistics:
- Temperature swings of 15–20°F between afternoon and evening are common at elevation; plan for both
- Guest transport and parking matter more at mountain sites; a shuttle from a base parking area protects narrow access roads and reduces liability
- Generator and service vehicle access needs to be confirmed with the venue before booking; some mountain roads have weight limits
- Wildfire season (typically June through September in the Southeast and West) may affect open-flame permits; check with your county fire marshal
Pro Tip: Use local materials wherever possible. Native wildflowers, stone, and raw wood cost less than imported florals and look more natural against a mountain backdrop. Brides recommends pairing these with bonfire stations and basketed blankets for guests on cool mountain evenings.
Mountain weekend scheduling checklist:
- Friday: guest arrival, welcome dinner or rehearsal dinner, bonfire or s’mores station
- Saturday: ceremony, cocktail hour, outdoor reception dinner, dancing
- Sunday: morning brunch, checkout, optional activity (hike, pool time)
Cherrywoodranchweddingvenue’s outdoor mountain reception spaces in the North Georgia Mountains are built for exactly this format. The venue combines onsite lodging for up to 16 guests with outdoor ceremony and reception spaces, a pool, and a hot tub, so the weekend flows without anyone needing to drive between locations. For couples weighing whether a multi-day format fits their guest list, this breakdown of mountain escapes covers the logistics and appeal in detail.
What site-first planning actually means for your reception
Most couples start with a mood board. That is not wrong, but it creates a specific problem: they fall in love with a look before they know whether their site can support it. The couples who end up with the most cohesive receptions almost always did the opposite. They walked the site first, identified what was already beautiful about it, and then built a design around those assets.
A mountain ridgeline view does not need a floral arch in front of it. A grove of old oaks does not need string lights on every branch. The site is already doing the work; your job is to frame it and make guests comfortable within it. That shift in thinking also saves money, because you stop spending on decor that competes with the setting and start spending on the things that actually improve the guest experience: lighting, flooring, shade, and temperature management.
The other thing most articles understate is the value of a multi-day format. A single-day outdoor reception compresses setup, ceremony, dinner, dancing, and teardown into a window that leaves almost no margin for weather delays or vendor issues. A weekend format absorbs those variables and gives guests a reason to stay present rather than watching the clock.
Cherrywoodranchweddingvenue: a private mountain weekend with everything onsite
Couples who want a private outdoor reception without the vendor coordination puzzle of a blank-field venue have a different option in the North Georgia Mountains.
Cherrywoodranchweddingvenue offers a destination wedding weekend that combines outdoor ceremony and reception spaces with onsite lodging for up to 16 guests, a pool, a hot tub, and event coordination, all on one property. The venue is designed for intimate weddings of 25–75 guests where the couple wants their closest family and friends in one place for the full weekend, not just the ceremony hour.
The outdoor spaces sit against North Georgia mountain views, and the multi-day package format means your tent, flooring, and lighting vendors have real setup time rather than a compressed morning window. Confirm local permit requirements for your specific event with the venue team, and check availability for your date at the Georgia mountain venue page.
Sources
- Outdoor Dance Floor: Best Options for Grass, Sand & Uneven Surfaces
- How to Plan a Tented Outdoor Reception: From Tent Types to Layout and Lighting | Plan A Wedding
- 31 Outdoor Wedding Ideas to Fit Your Venue and Budget